


7 Mistakes You're Making with Duct Leakage Testing (and How to Fix Them)

Duct leakage testing isn't rocket science, but it sure feels like it sometimes! If you're finding yourself scratching your head over inconsistent results, frustrated clients, or callbacks that could've been avoided, you're probably making one (or more) of these seven common mistakes.
Don't worry: we've all been there! The good news? These mistakes are totally fixable, and once you know what to watch for, your testing game will be stronger than ever.
Mistake #1: Using Tape and Plastic That Screams "Amateur Hour"
The Problem
Picture this: you show up to a job with dollar-store tape and flimsy plastic sheeting that tears if you look at it wrong. Not only does this make you look unprofessional, but it's also setting you up for failure! Cheap sealing materials don't hold up during testing, leading to air leaks that throw off your measurements completely.
The Fix
Invest in professional-grade sealing materials designed specifically for duct testing. We're talking about high-quality tape that actually sticks and stays put, and durable plastic that won't tear the moment you touch it. Your test results will be more accurate, and your clients will see you mean business.
Pro tip: Keep a well-stocked toolkit with quality sealing supplies. It's a small investment that pays huge dividends in credibility and results!

Mistake #2: Creating Callbacks for Paint Touch-Ups
The Problem
Nothing ruins a good day like getting a call from an angry homeowner because your tape pulled off their fresh paint or left sticky residue all over their walls. This happens when you use the wrong type of tape or leave it on too long.
The Fix
Use painter's tape or low-tack tape designed for delicate surfaces. Remove all tape as soon as your testing is complete: don't let it sit there while you pack up your equipment!
Better yet, communicate with your clients about recent paint jobs before you start testing. A little heads-up goes a long way in preventing problems.
Mistake #3: The Great Tape Hunt (AKA The Drive of Shame)
The Problem
You're halfway through a job when you realize you're out of tape. Sound familiar? Now you're making an emergency run to the hardware store while your client waits, and let's be honest: it doesn't exactly scream "professional."
The Fix
Always, and I mean ALWAYS, pack more supplies than you think you'll need. Create a checklist and stick to it. Keep backup supplies in your vehicle because Murphy's Law loves duct testing!
Consider setting up a system where you restock immediately after each job. Future you will thank present you!
Mistake #4: Fighting with Dirty Vents
The Problem
You arrive at a job site only to find vents caked with dust, pet hair, and who-knows-what-else. Trying to get a good seal on dirty surfaces is like trying to stick tape to a fuzzy sweater: it's not happening!
The Fix
Always clean the surfaces you need to seal before starting your test. A simple wipe-down with a damp cloth can make all the difference. For really stubborn dirt, bring some basic cleaning supplies.
Don't forget about dirty air filters! Remove them or ensure the filter housing is empty before testing. These little details can dramatically affect your results.

Mistake #5: Doing Your Blower Door Test First
The Problem
Here's a mistake that'll make your day longer and your clients crankier: performing the blower door test before setting up your duct leakage test. Since duct testing requires more setup time, doing it second means the house stays uncomfortable longer, especially on those scorching summer days or freezing winter mornings.
The Fix
Set up your duct leakage tests first, then follow up with the blower door test. This simple switch in order keeps everyone more comfortable and makes your workflow more efficient.
When you do set up your blower door, run the hose to the outdoors before completely assembling the door. Trust us: crawling around trying to route hoses after everything's set up is nobody's idea of fun!
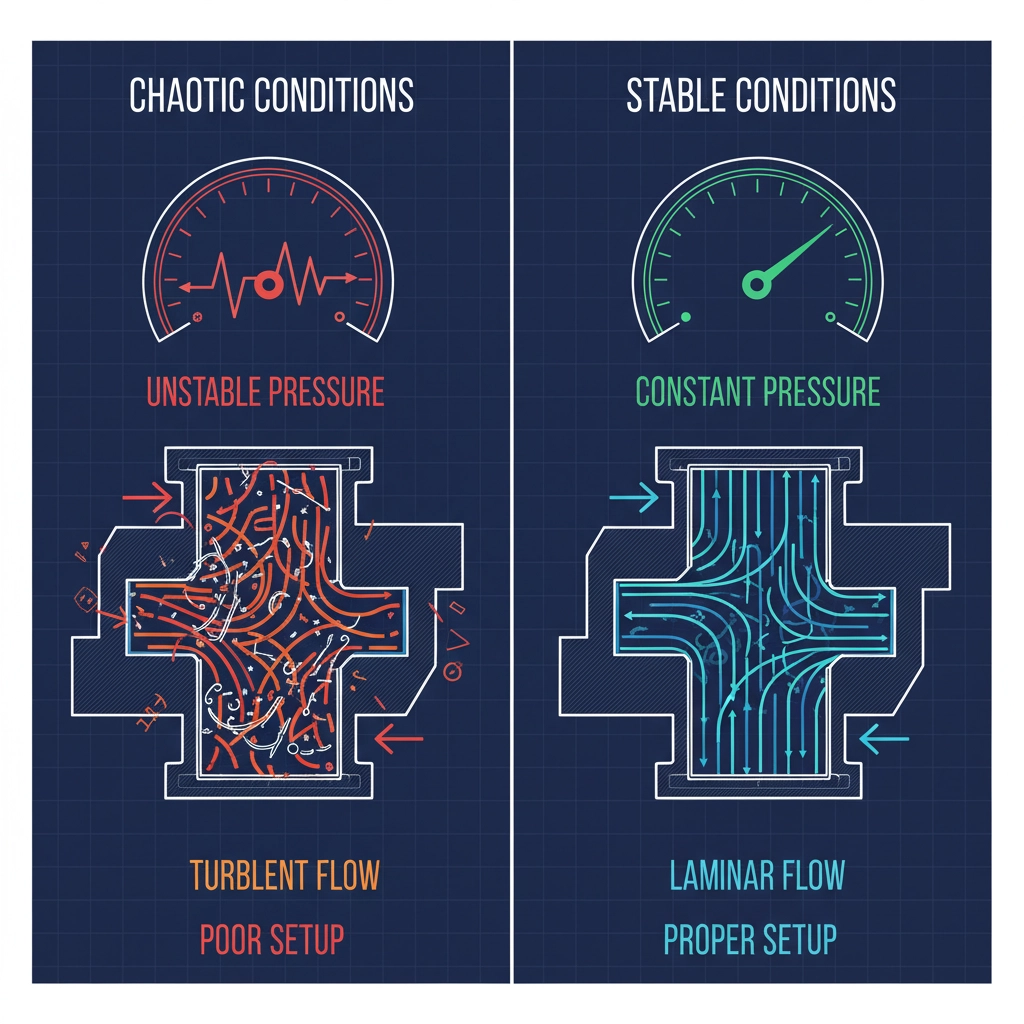
Mistake #6: Ignoring Pressure Fluctuations
The Problem
Test pressures that jump around like a kangaroo on caffeine produce results that are about as reliable as a weather forecast. Fluctuating pressures make it impossible to get consistent, reproducible results, which means your data is essentially worthless.
The Fix
Make sure you're maintaining constant, stable test pressure throughout your entire measurement. If you're seeing fluctuations, stop and figure out what's causing them before continuing.
For systems with long, narrow ductwork, always evacuate the test area before filling it with tracer gas. Air trapped in those tight spaces prevents your tracer gas from reaching potential leak areas, giving you false negatives.
Mistake #7: Using the Wrong Test Method (Or Not Understanding Your Test)
The Problem
This is the big one! Using an inappropriate leak-detection method for your specific application is like using a hammer when you need a screwdriver: it might work, but it's not going to be pretty.
Even worse is not understanding what you're actually measuring. Are you accounting for differences between air and helium viscosity? Is your test pressure matching the system's operating pressure? These details matter more than you might think!
The Fix
Take time to truly understand your testing methods and equipment. Select the right leak-detection method based on your specific requirements, not just what's convenient.
Make sure you understand which test medium you're using and how to properly convert between different gases if needed. Your test pressure should match the operating pressure of the duct system: if it doesn't, apply the proper conversion calculations.
Stop relying solely on visual methods like bubble tests. Reproducible measurement methods will give you the accurate, defensible results you need.
Ready to Level Up Your Duct Testing Game?
These seven mistakes might seem like small details, but they can make the difference between a smooth, professional job and a complete disaster. The good news? Now that you know what to watch for, you're already ahead of the game!
Remember, quality duct leakage testing isn't just about having the right equipment: it's about using the right techniques, materials, and methods every single time. Your clients deserve accurate results, and you deserve to look like the pro you are.
Want to make sure you're equipped with the best tools for the job? Check out our duct leakage testing equipment and see how the right gear can make all the difference in your testing accuracy and efficiency.
Have questions about duct testing techniques or need help choosing the right equipment? We're here to help! After all, we're in this business because we believe in making green faster: and that includes making your testing process faster, more accurate, and more professional.